QReserve Booking Instructions
Thank you for using the CSC’s QReserve booking system.
This page will provide instructions on:
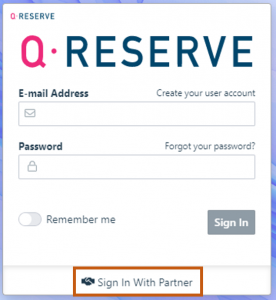
- Step one: Go to https://my.qreserve.com/ and press “Sign In With Partner”.
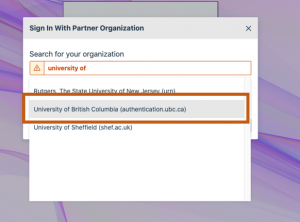
- Step two: In the search bar, type in “University of British Columbia” and select it from the drop-down menu.
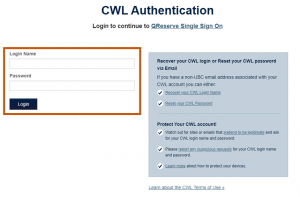
- Step three: Enter your CWL and password credentials. Log in to QReserve.
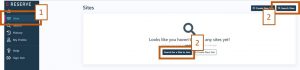
- Step four: Once logged in, click “Sites” and then click “Search for a Site to Join” or “Search Sites”.
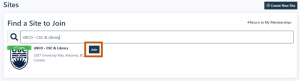
- Step five: On this page type “UBCO – CSC & Library” in the search bar and click on “Join” in the top right corner of the correct icon.
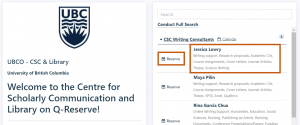
- Step six: You now have access to the UBCO – CSC & Library site. To book an appointment with a writing consultant, select the name of a writing consultant or click ‘Reserve’ next to their name.
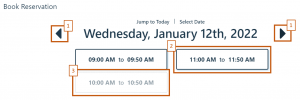
- Step seven: Navigate to the date of your preferred appointment by using the arrows on the right and left (1). Once you find an available appointment time that works for you, click it (2). Greyed out times indicate that the appointment time is unavailable (3).
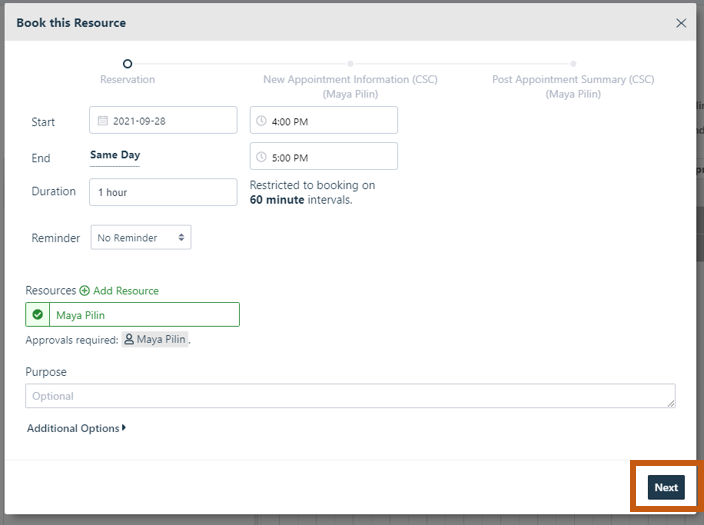
- Step eight: A new window will pop up to book your reservation. If you are satisfied with the date and time, click “Next”.
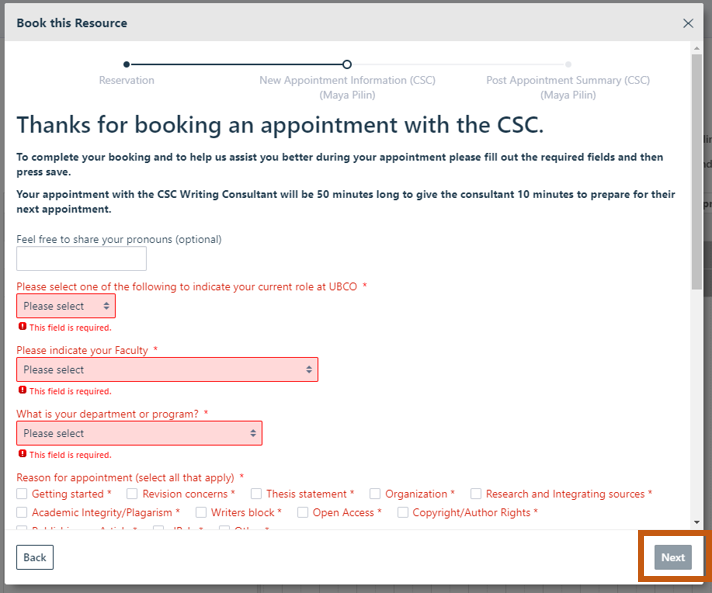
- Step nine: You will now need to fill out some pre-appointment information. Once finished, click “Next”.
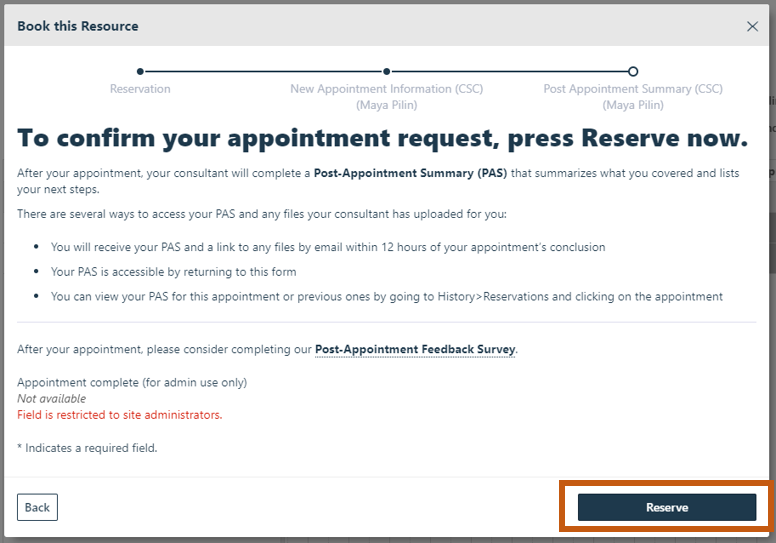
- Step ten: To confirm your appointment, click “Reserve”.
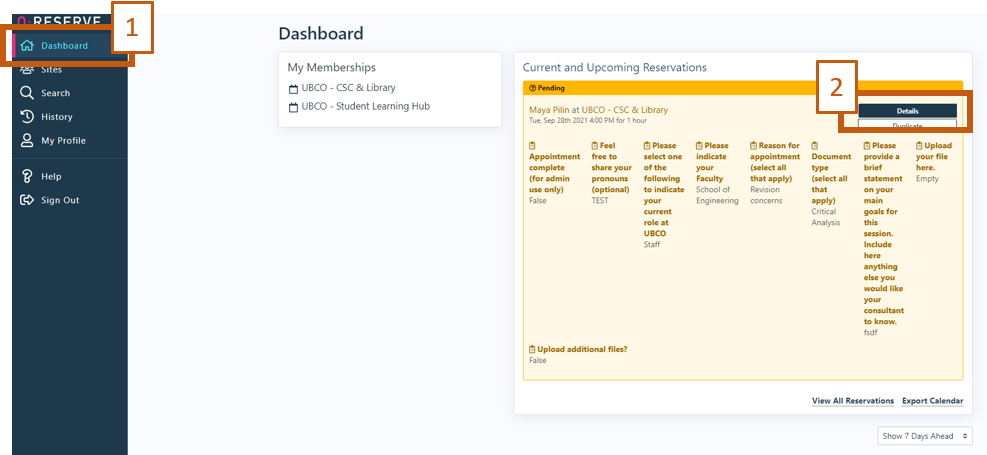
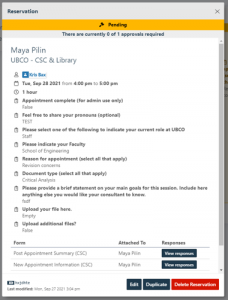
- Step eleven: If you click on “Dashboard”, you will be able to see your reserved appointments (1). If you click on “Details” a new window will appear (2).
- Step twelve: This new window allows you to see all your appointment details. This is also where you would go to cancel your appointment.
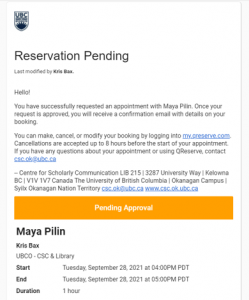
- Step thirteen: Depending on how your writing consultant has set up their resource, you will either receive an email telling you your appointment has been approved or is pending. If it is pending, your writing consultant will need to approve your appointment, after which you will receive another email telling you your appointment has been approved. Any meeting details (e.g., zoom information) will be provided in your approval email.
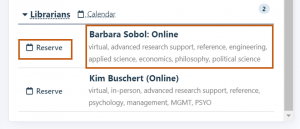
- Step fourteen: To book an appointment with a subject librarian you will have to access their calendars by selecting either their name or ‘Reserve’. This will take you to their calendar view where you can book an appointment.
- If you have any questions please contact us at csc.ok@ubc.ca
What is Written e-Feedback? For a written e-feedback appointment, a CSC consultant will review your document and provide their suggested revisions in a response letter within 24 hours after the appointment time ends. For an example of a response letter download this file
When you book an appointment, you will receive more information by email on what to expect from the written e-feedback process. Please make sure that you are able to receive emails from the Q-Reserve booking system. You should plan to book your written e-feedback appointment several days before your deadline so that you have time to complete suggested revisions and clarify any follow-up questions.
You will require:
- Your CWL
- An internet connection, and
- A document you would like feedback on.
- Need help? Contact us here!
- Step one: Go to https://my.qreserve.com/ and press “Sign In With Partner”.
- Step two: In the search bar, type in “University of British Columbia” and select it from the drop-down menu.
- Step three: Enter your CWL and password credentials. Log in to QReserve.
- Step four: Once logged in, click “Sites” and then click “Search for a Site to Join” or “Search Sites”.
- Step five: On this page type “UBCO – CSC & Library” in the search bar and click on “Join” in the top right corner of the correct icon.
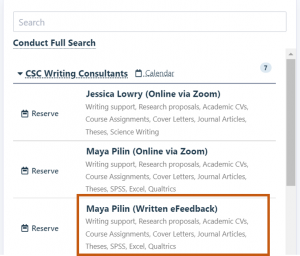
- Step six: You now have access to the UBCO – CSC & Library site. For a written e-feedback appointment, choose the writing consultant’s name followed by “(Written eFeedback)”.
- Step seven: Navigate to the date of your preferred appointment by using the arrows on the right and left (1). Once you find an available appointment time that works for you, click it (2). Greyed out times indicate that the appointment time is unavailable (3).
- Step eight: A new window will pop up to book your reservation. If you are satisfied with the date and time, click “Next”.
- Step nine: You will now need to fill out some pre-appointment information. Once finished, click “Next”. You will be asked to upload the file you would like feedback on. You may change this file before the appointment time if you would like to replace it with a more updated file. You can also upload additional files (e.g. assignment guidelines and/or rubrics). If you add additional files, make sure you specify which file you would like feedback on from the consultant.
- Step ten: To confirm your appointment, click “Reserve”.
- Step eleven: If you click on “Dashboard”, you will be able to see your reserved appointments (1). If you click on “Details” a new window will appear (2).
- Step twelve: This new window allows you to see all your appointment details. This is also where you would go to cancel your appointment. You can also upload a more recent version of the file that you would like e-feedback before your appointment starts on by selecting “Edit” and choosing a new file to upload. Remember to remove the old file so it is clear which file the consultant should provide feedback for.
- Step thirteen: Depending on how your writing consultant has set up their resource, you will either receive an email telling you your appointment has been approved or is pending. If it is pending, your writing consultant will need to approve your appointment, after which you will receive another email telling you your appointment has been approved. Your approval email will explain how the written e-feedback process works and how to access the feedback response letter from the writing consultant after the appointment time. Please note that the consultant may take up to 24 hours after the end of the appointment to upload the written e-feedback response letter.
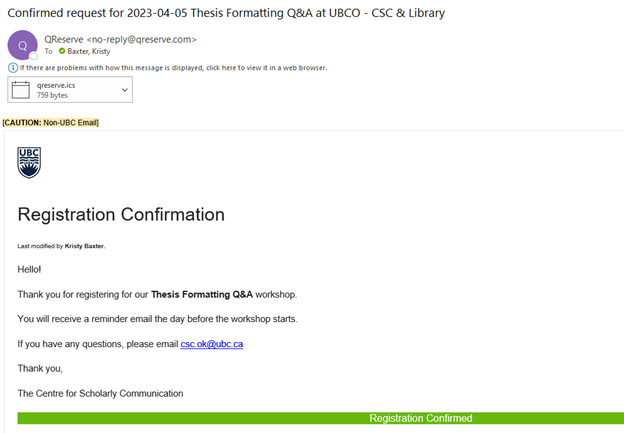
- Step one: Open your confirmation email.
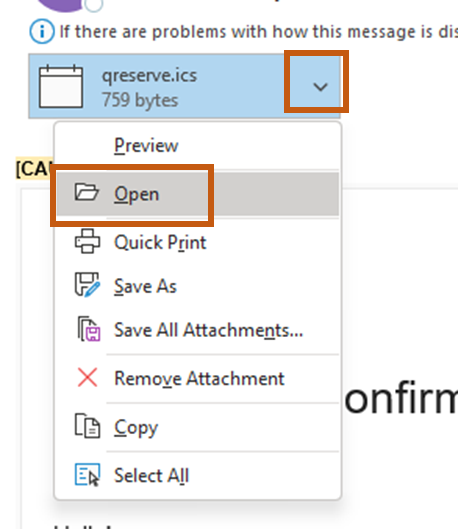
- Step two: Click on the down arrow beside ‘qreserve.ics’ and then click ‘Open’.
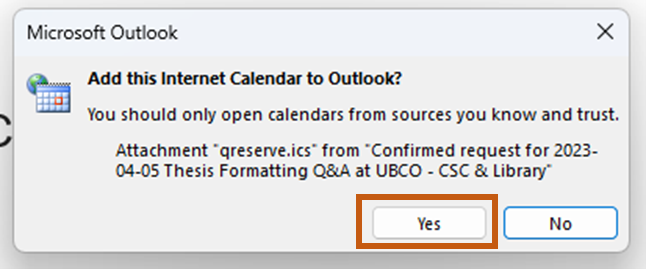
- Step three: On the pop-up that appears, click ‘Yes’.
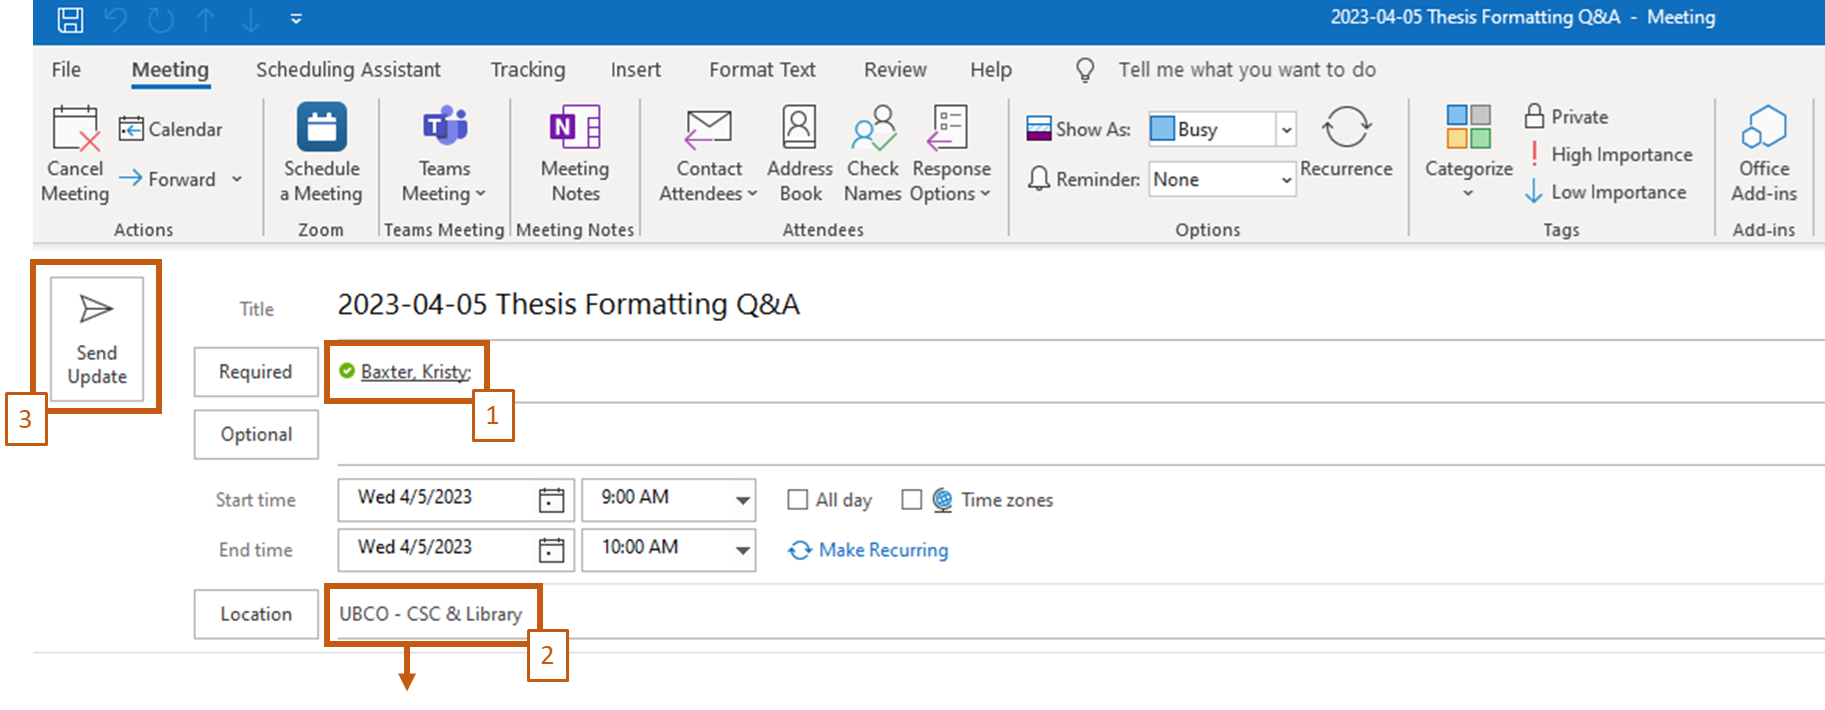
- Step four: A new window will appear with your meeting invite details. Format the email however you would like (i.e., ‘Show As, Categorize, etc.). Add your email in the ‘Required’ field (1). If you would like, update the location with the appropriate details (i.e., room number or online). If the event is being held online, you may also want to add the zoom meeting details in the text space below (2). Click ‘Send Update’ (3).
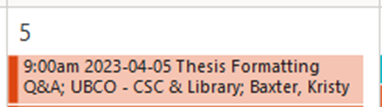
- Step five: Your event will now appear in your calendar.
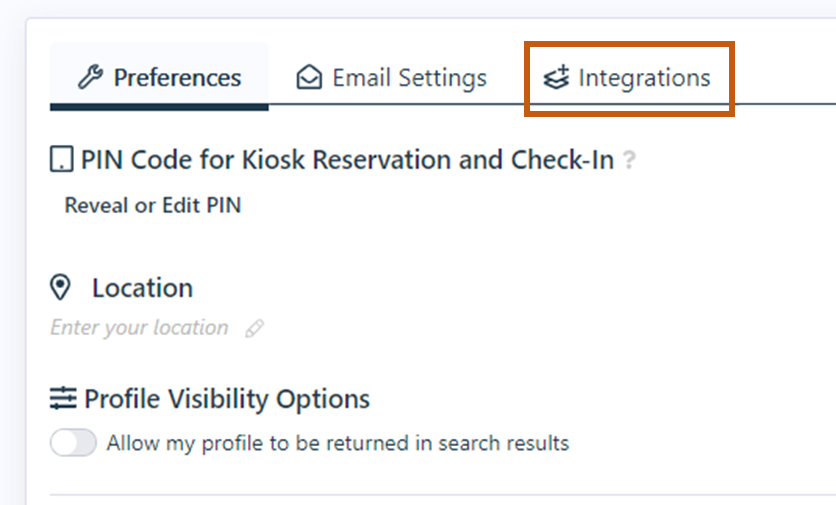
- Step one: In QReserve, click on ‘Profile’.

- Step two: In your profile, click on ‘Integrations’.
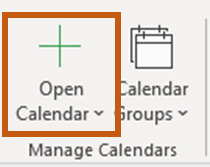
- Step three: In Outlook, at the bottom left corner click on the calendar icon.

- Step four: Click on ‘Open Calendar’ in the ‘Manage Calendars’ section located in the top toolbar.
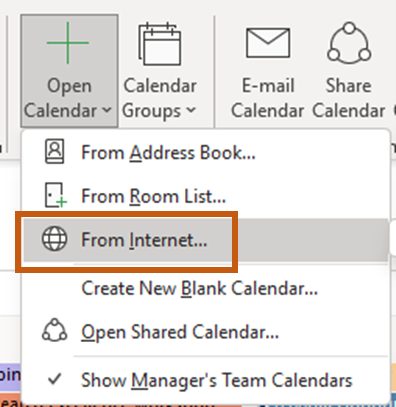
- Step five: Click ‘From Internet…’
- Step six: In QReserve, click on ‘Manage ICS Feed’ (1) and then click on ‘Copy to Clipboard’ (2).

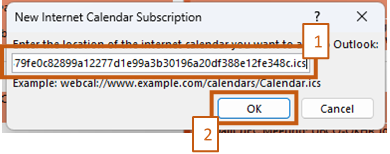
- Step seven: In Outlook, paste the URL into the empty field (1) and click ‘OK’ (2).
- Step eight: If a warning appears saying your calendar does not contain any appointments and asking if you want to add the calendar, click ‘Yes’.

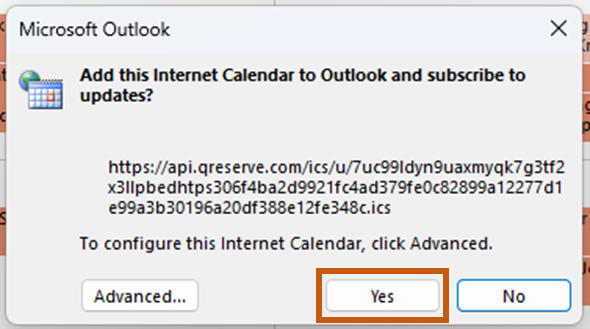
- Step nine: When the pop up that asks ‘Add this Internet Calendar to Outlook and subscribe to updates’, click ‘Yes’.
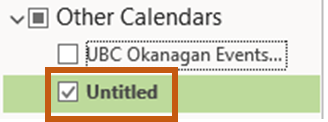
- Step ten: You will now see a new calendar in your list of calendars on the left-hand side. Feel free to rename this calendar.
- Step one: In QReserve, click on ‘Profile’.
- Step two: In your profile, click on ‘Integrations’.
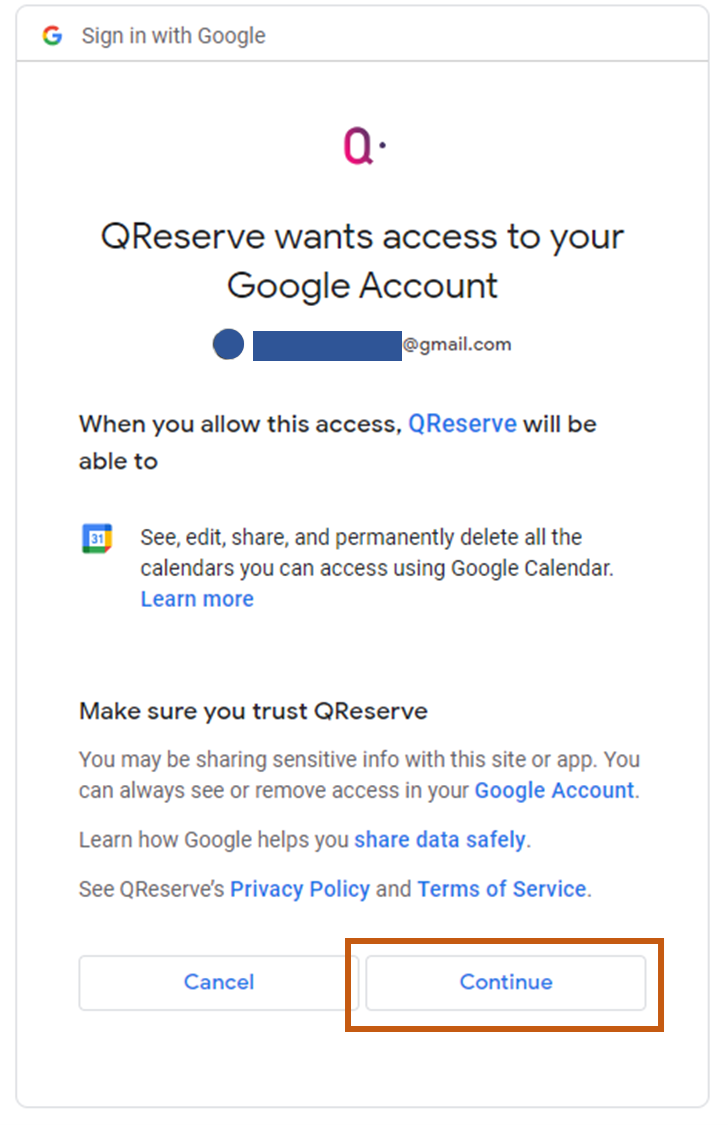
- Step three: Beside ‘Google Calendar’ click ‘Connect’.

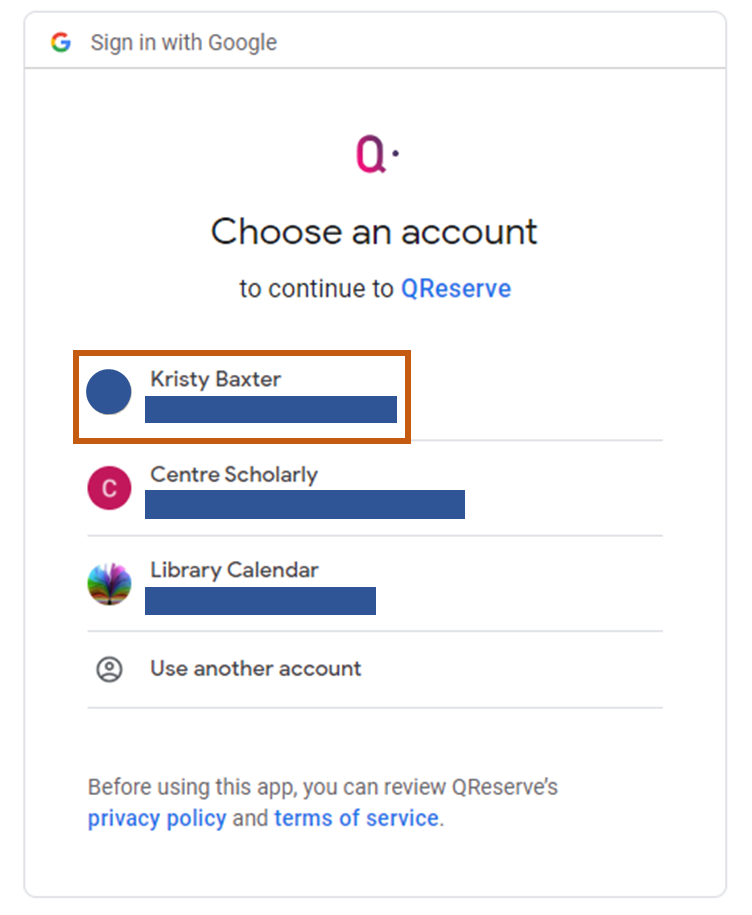
- Step four: Click on which account you want to sync with your QReserve calendar.
- Step five: To give QReserve access and add your calendar click ‘Continue’.